Wednesday, June 26, 2013

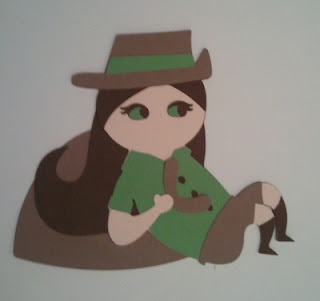
Hi, everyone!  Just popping in to let you know about the July Fantabulous Cricut Crawl!  The theme is--wait for it--RED, WHITE AND BLUE!


I've got a cool project all dreamed up and partially cut out--now I just have to make it!

Please crawl with us if you have a chance--I may be offering up some awesome blog candy...

She Blinded Me With Science

So they have a science station at Vacation Bible School, for the younger kids.  I don't know what science projects they're doing, because I'm with the older kids doing mission projects.  But I made these door decorations for the science room.


Love this one!  The DP is old ( can't even remember the name of it and it was one of my fave lines!)  I used Cri-kit markers to draw the details on the beaker, flask, and test tube, and I love how the beaker in the middle seems to have a combination of the substances on either side!  This cut and the next are from Locker Talk.


Here is a microscope.  I cut it out using those fun bright papers, so it doesn't really look much like a microscope, but I like it anyway.


This fun atom is from Nifty Fifties.  I cut all the colors from glitter CS.


Love this bug in a jar!  It's from Boys Will Be Boys.  


Again with the glitter CS--cut is from Recess.


And the recycle symbol, from one of my fave carts, Give a Hoot.

I have had so much fun making these.  I've also had fun teaching at VBS.  Yesterday we baked cookies and made thank you notes and took them to the first responders in our town.  Today we made pipe cleaner mosquitoes and tie-dyed T-shirts.  Our overall mission is to buy mosquito nets for kids in Zimbabwe.  So far we have bought 10 at $10 apiece.  Our new goal is 20.  The mosquitoes are to raise awareness about malaria in our congregation.  The tie-dying was just for fun.

The kids are really great, but we have 16, and, well, let's just say, they're not quiet types.   Last night and tonight I had to have a little drinky-binky when I got home.  Thank God we are Methodists!  My son is also volunteering, shepherding the 2nd graders (he is getting a milkshake LOL).  My husband helped serve the meal prior to VBS tonight, and Ems is attending, so it really is a family affair!

What are some of the ways you use your talents in the world?  I know my friend Chris sells her cards and donates the money to her local animal shelter.  Lots of people send their cards to the Ronald McDonald House or Operation Write Home.  How about you?  Let me know in the comments!

Have an awesome day!

Monday, June 24, 2013

Fantabulous News!

Hurray!  I have had the honor of being asked to join the Fantabulous Cricut Design Team!  I am beyond excited.  I will be on it for 4 months.  I am really pleased because I love their blog.

To celebrate, I wanted to begin posting some of the things I've made for our church's vacation Bible school.  The theme is "The Everywhere Fun Fair".  Each day we will be talking about different ways to be a neighbor and focusing on a different country.  The countries are Japan, Zimbabwe, the UK, Australia, and Mexico.  I am teaching the 4th and 5th graders, along with several other teachers.  Their segment is called Mission: Possible, and we will focus on service projects.

I have the Children of the World Cricut Lite cartridge, and I thought it would be perfect to make some cute door decorations.


Actually, this first one, the heart-shaped world, is probably my favorite cut from the Give a Hoot cartridge.  I cut it at 8".


Here is little miss Japan.  I just love her kimono!  She is cut at 6".


I used the Scottish boy (6") for the UK.  He was a little hard to put together--I had a bit of a time figuring out his layers.


I love the little African boy (6")!  He is my favorite because of his colorful outfit.  I used PTI Dark Chocolate for his skin, and the DP is SU's Epic Day This and That.


Here is the little Mexican boy (6").  I thought his outfit was a bit plain, so I added a strip of ribbon.  Love his maraca!


For some reason, I decided to cut the Aussie girl at 8", so she's a little bigger than the others, but I didn't want to redo her! 

Our Director of Dicipleship Development (aka our Christian education minister) decided to put these up on the door of the storytelling room.  Besides cutting out Cricut decorations, I also put colorful butcher paper up on 4 doors, and then laminated them with clear contact paper.  Man that was a chore, and they don't look great by themselves, but with all the decorations on them they look ok.Well, thanks for stopping by today, and be sure to subscribe to Fantabulous Cricut Challenge Blog!  They have a new challenge every Monday, plus great posts everyday, covering things like useful tips and scrapbooking.

Monday, June 17, 2013

Go Fly a Kite

I love the Mary Poppins movie with Julie Andrews.  Do you know she won a Best Actress Oscar for that movie?  A kids' movie!  My favorite song from that movie is "Let's Go Fly a Kite".  It just makes me happy.


This was my experiment with a center-step card.  It is 5.5" square.  The cut is from the Nate's ABC's cartridge.  In the book it is shown a little more landscape than portrait, so I modified it a bit to make it fit.  Colors are Tempting Turquoise, Certainly Celery, and Apricot Appeal and either Crumb Cake or Sahara Sand on the bottom, can't remember which.  The sentiment is from PTI's Pond Life Sentiments.  My label didn't turn out quite like I wanted but it's okay I guess.  

I like this fold, but you have to have 6 x 6 envies, which SU doesn't sell anymore.  Guess I need to find a source LOL!

Thanks for dropping by today--see you later!

Friday, June 14, 2013

Cute Boots


There's a musical on Broadway now called "Kinky Boots"  LOL!  Well, none of those here, but we do have some cute rain boots!  Ever since I got this cloud EF from SU's spring mini, I've been wanting to use it with these boots.  Finally got around to it!


Both of these cards are a modification of the side-step/center-step cards.  I wanted to make it a center step, but they are actually 5.5" square.  My friend and awesome demonstrator Karen suggested I just make a center step but without one side.  I stamped one boot in Palette Noir, masked it with a post-it note, and stamped the other boot.  I colored them with Pool Party reinker and a blender pen, cut them out and coated them with Crystal Effects for a shiny plastic effect.  I let them dry overnight.  The top card is on a base of PTI white.  I decided it was too much white so made a second card with Pool Party as the base.  I added some Sycamore Street DP to the bottom because it reminded me of rainbows.  Then I had to figure out what to do with the little side strips.


The first card just has a strip of PP embossed with the Cuttlebug folder Swiss Dots.  On the second card, which was already PP, I clear heat-embossed a little border from one of the sets that was in the SAB catalog (can't remember the name).  I added ribbon and a sentiment.  I thought they'd make good get well cards.


Here they are together.  I think I like the one on the Pool Party base the best--what do you think?

Have a great day!

Wednesday, June 12, 2013

Some More Epic Day This and That Cards

In my LAST POST, I showed you a card I'd made using Epic Day This and That from SU.  I had some scraps left over, so decided to use them on some more cards.


The first had predominantly Daffodil Delight and Pool Party on it,  so I went with that for my card.  I love DD, but it is a very difficult color to use--it's SO bright.  This card does kind of poke you in the eye, but I think I like it. I was playing around with some new Edgelits dies and embossing folders, also this new thing I got that fits on your scoring board.  SU makes it but it works with the MS board took, which is what I have.  It has various patterns on it like scallops, waves, chevrons, etc in different sizes, and a clear stencil-like thing.  You put your paper on top of the pattern you choose on the grooved piece, and the clear piece over it (rub with wax paper first), then use your stylus.  Flip your card to see your embossed design.  A couple of things:  THIS TAKES PRACTICE!  Also, be sure to rub the wax paper on your CS and do it on the BACK side of your project.  On the above card I added a scallop between the edge and the part embossed with the folder.  Hard to see in the pic but looks nice IRL.


On this card I used one of the grooves that coordinates with one of their Framelits dies (Apothecary Labels I think).  I did it on Crumb Cake, then added piercing with the piercing template that matches the dies.  (Yes, I have the piercing template, but not the dies.  It came in a pack that matches dies I DO have.)  Then I took the clear template and traced the line that matches the dry embossed line onto my DP and trimmed it to fit in the dry embossed line.  I used another folder to emboss the top, added the brad and ribbon and mounted on distressed Calypso Coral.  Card base is Crumb Cake.  It looks kind of bare on the front, but I couldn't decide on a sentiment, plus I was afraid if I did add one, it would look too crowded LOL!  So I think I'll just leave it as is and put a sentiment on the inside.

So, I've had a lot of fun playing with some neglected toys lately, which is a good thing because at the end of this week my new stuff from SU is coming in!  No stamp sets, but all the new In Colors, which I LOVE, and some new embellies to play with--YAY!

Thanks for stopping by today--what will you create today?

Monday, June 10, 2013

Stamp Club Swap for June

Saturday we had our stamp club meeting, and this was my swap card.  I used This and That Epic Day designer paper (love ALL of it!), the honey comb embossing folder, and two current sets.  CS is Gumball Green and Crumb Cake under the white panel.  I didn't color any numbers so people could use them for whatever birthday they needed.  Ink is GG, Calypso Coral, and Palette Noir.  I also used the Hearts a Flutter Framlits die set for the banners, and the Top Note die.Very pleased with how it turned out.


We had a lot of fun playing with the new In Colors today--we made two VERY pretty cards.  I really like ALL the new colors--which usually there is at least one I'm not crazy about.  Last year I didn't really care for any of them, but I did get Gumball Green and Primrose Petals because they coordinated with the Christmas paper.  Summer Starfruit is also starting to grow on me.

Anyway, I ordered the combo pack with includes an assortment of CS in the new In Colors and the ink pads.  I also ordered the Boutique Details, which are sort of like buttons without the holes, some ribbon and some new candy dots.  I ordered the new In Color reinkers and the Color Coach cards for the new In Colors.  It will be nice to have some new stuff to play with.  Like I've even used all the stuff I have LOL!

Have a great day!

Wednesday, June 5, 2013

Masculine Cards part II

So here are some more man cards!  I used SU's In Wilderness set (retired, of course!)--the same one I used for the bison card a couple of posts ago.  


I have never liked the color Basic Gray that SU replaced Going Gray with several years ago.  Now they are bringing in a new, lighter gray (Smokey Shadow maybe?  Not sure--Smokey something).  But I still had a few scraps of GG here and there and stamped the wolf on it with Basic Gray--LOVE how it looks!  Also the trees from Lovely as a Tree for the BG.  Thought about backing it with Real Red but decided I liked Cherry Cobbler better.  Card base is Basic Gray.


On this one I used an old Mojo Monday sketch and a brown color scheme.  Wolf is stamped on Soft Suede with Early Espresso and layered on EE.  DP is from SU's Christmas papers a couple of years ago.  I used hemp for a fiber accent.

I like both of these pretty well.  I have more ideas for man cards, so stay tuned!

Monday, June 3, 2013

Masculine Cards


In my last post I told you that I'd needed a birthday card for my brother and had to whip one up really quick to get it in the mail.  I am always needing man cards, so I decided to make several at one time to avoid the last minute crunch.  


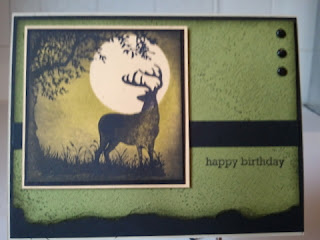
These two cards use SU's Nature Silhouettes (retired).  I cased these from a swap I got at some point at a SU function that I've been hoarding!  I punched a circle out of a sticky note and used it to mask the moon on a piece of So Saffron CS.  I sponged Old Olive all over the CS, and Basic Black around the top of the moon.  I stamped the tree, wolf, and deer images in Basic Black Craft ink--it's more opaque.  Then I dried it with my heat tool so it wouldn't smear.  Next I trimmed the square down from a 3" to a 2.75" square and sponged the edges with Basic Black.


The card base is River Rock.  I used my Texture and Always Artichoke ink to add a BG to my Old Olive piece, tore it and sponged the edges.  I added a strip of black and layered it on black.  The stamped piece is layered on black and then on So Saffron.  The top card is a case of the original, but I decided I wanted to use the label holder on the second one and couldn't get it to work in the landscape orientation.  I'm pleased with the way both of these turned out.  

Thanks for dropping by today--have an awesome day! 


Sunday, June 2, 2013

Featured Today on FCCB!

Hi, everyone, I just wanted to share that I am featured on the Fantabulous Cricut Challenge Blog today! Arin said some really nice things about me and shared some of my projects, and I'd really like it if you'd go over and leave them a little love!