Friday, December 28, 2012

Swing Card

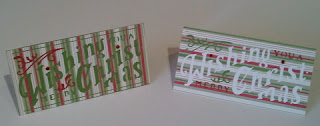
So, through another blogger (sorry, don't remember who), I discovered that the CTMH Artiste Cricut cart has fancy swing cards on it.  While doing a search, I discovered THIS video.  I was incensed to discover that if I wanted to do layering of the shapes I'd have to order BOTH CTMH carts, the other one being Art Philosophy.  Not wanting to pay $99 apiece for them, I hit eBay, and got them for somewhat less, although still more than I will ordinarily pay for a cart.  But they each came with 3 coordinating stamp sets and 3 sheets of chipboard shapes.  And they really do have a lot of neat stuff on them.  But I absolutely LOVE how this swing card turned out.  I used SU retired DP, cut at 5.5" tall, and Whisper White.  Stamp set is retired SU Curvy Verses.  Butterflies are SU Sizzlits.  I backed the card with a 1/4 sheet of Basic Gray CS for some stability.   I think the rhinestones came from Hobby Lobby.


When you open it it looks like this--the sender can sign the inside without the writing showing.


There are several other shapes of these so you'll probably be seeing more of them over the next several days.  Hope you all got some crafting goodies for Christmas--my friend Chris got a Silhouette!  I am so jealous.  Have a wonderful day!


Thursday, December 27, 2012

Santa Gift Bag


So....I should be all done with Christmas and on to Valentine's Day, right?  But no, I'm still playing with ideas I didn't have time to execute.  Here I used A Quilted Christmas to make a gift bag.  I used my G to place the image in the middle of my mat and placed a 12 x 12 sheet of CS, then cut and assembled Back of bag is another piece of 12 by 12.  Both pieces are scored at 2" on sides and bottom and adhered with Sticky Strip.  Top is also scored, folded to the outside, and edged punched.  Looks really cute with the tissue paper inside!


I used the card feature at 6" and used the G to hide the outline and score marks of the card.  I love how this turned out!  Thanks for dropping by; I hope you all had a merry Christmas!  And I wish you a happy New Year!

Thursday, December 20, 2012

Gifts of the Magi


For some reason I didn't make many sacred cards this year.  Of course I made the ones for the church auction and shut-ins, but this is the only other one I made.  Not sure why.  I totally cased this card--you can see the original HERE.  It looks like such a simple card doesn't it?  I kept messing it up, but finally got a finished product I could live with. 


I made a frame out of copy paper, then sponged inside it on CS with Bashful Blue, stamped the main image, from SU's Come to Bethlehem, in Night of Navy.  I embossed the sentiment in silver and added the rhinestone brad.  Layered onto N of N and card base is brushed silver.  Main panel is misted with Champagne shimmer paint in alcohol--very sparkly IRL but you can't tell in the pic.

Thanks for stopping by today.  Peace be with you all.

Wednesday, December 19, 2012

Hearts Come Home For Christmas

Last month I posted a Christmas card HERE.  I loved it so much I wanted to use that design again and finally got around to it.  The first one is actually the one I made last.  Love Lives Here Holiday by PTI has such amazingly wonderful sentiments I had to think of ways to use several of them.  


I box pleated the DP, die cut and embossed the main panel, and stamped the holly.  I have lost the little berry stamp so used Stickles instead.  I die cut and stamped the house from Love Lives Here.  Colors are Primrose Petals, Gumball Green, and Cherry Cobbler.  Main panel is Very Vanilla, layer is Cherry Cobbler, base is Gina K Heavy Base Weight cream--love that stuff, so luxurious.


The second card I had all planned in my head for weeks before I ever made it.  That almost never happens to me.  I made 4 of these, I liked them so much.  Sorry the pix are so blurry--I took them last night because I wanted to get them in the mail this morning.  Trust me, IRL, they are adorable.

Thanks for dropping by.  Hope you all are enjoying this time with your families.  I think we all appreciate them even more this year than usual.

Saturday, December 15, 2012

Sparkly Wreath Card

 Here is another digi file from PC.  I added a LOT of stickles, and I love how pretty and sparkly this card is!  If I do this card again I think I will emboss the bow.  Forgot to do it this time.


This was so much fun to make.  Have a creative day!

Friday, December 14, 2012

Cricut Christmas Cards

ProvoCraft has been selling digital files on their website to use with Craft Room.  The digital cartridges can be downloaded and used with Gypsy, and up till recently the other digi files have downloaded to my G too.  Unfortunately, these would not, and PC wouldn't refund my money (they were pretty cheap, but still, it's the principle of the thing!)  But I LOVED this card, so I hauled my Cricut up from the basement to the computer so I could cut it.  They turned out even better than I thought they would.  These cards measure about 3.25" by 6.25".


 I used some of my all time fave DP from SU (long retired, of course!), Old Olive, Real Red, and PTI vanilla for the card bases.


The top two have red rhinestones for the i dots, the bottom two have stickles.


I love them all, but I think this one is my fave.

Now I just need to get my cards in the mail!  TFL!


Thursday, December 13, 2012

Happy Big 5-0, Brad!

Today is my husband's 50th birthday.  He was born in 1962, but rather than go with the "over the hill"/ graveyard theme, I decided on a 50's theme.  The Mad Men-esque man is cut at 4" from the Surburbia cartridge, as is "daddy-o" (1").


For the inside I used the Nifty Fifties cartridge and welded the letters and letter shadows for "fifty is".  "Nifty" is a phrase on the cartridge.


Colors are Pumpkin Pie, Kiwi Kiss, and Baja Breeze.  Patterned paper is old.

I bought a turquoise gift bag and cut a large "nifty" out and glued it on.  He is getting a porkpie hat (a la Breaking Bad) and a Heisenberg T-shirt (also BB).  Can you tell we are fans?   Brad is bald and has a goatee like Walt on BB, so I will post pix of him in his hat.

Thanks for stopping by!


Saturday, December 8, 2012

We Three Kings


I make Christmas cards for our church's shut-in members every year and put them out for everyone in the congregation to sign.  So I make them 8.5" x 5.5" so there's room for lots of signatures.  I was trying to use up some stuff I had, so I used glossy CS for the outside and retired (a VERY long time ago) Bliss Blue for the inside.  The cut is from Quilted Christmas.  I used the card feature and sized the image to fit on my card front.  Then I hid the contour lines for the edges and the score lines so I was left with just the image.  


I didn't use any adhesive on this card.  I pierced two holes on the fold lines and threaded some silver cord through them and tied a bow.  The inside is embossed in silver and says "Have a blessed Christmas"--ODBD stamp.  This was a pretty simple card thanks to the Cricut, but I think it has a pretty good "WOW" factor.

Thanks for looking!  Have a wonderful day.

Friday, December 7, 2012

Snowman Swap


We have stamp club on Sunday, so I made this card for my swap.  The set is Snow Much Fun by SU.  I got it and the embossing folder on sale during their online extravaganza.  Guess that means both will be retiring soon LOL!


Card base is Old Olive, embossed layer is Riding Hood Red.  I sponged Champagne Shimmer Paint on the raised parts.  Snowman is stamped in Staz On Timber Brown on Very Vanilla and colored with blender pens and ink pads.  I was going for a sort of vintage-y look.  Felt ribbon is retired SU.  This is a very simple but pretty card I think.  I hope my fellow stampers like it.

Thanks for dropping by and taking a look!

Sunday, December 2, 2012

Welcome to the Hive

After a long search, our church has finally hired a new youth leader.  He is really nice and I think will be great!  I made him a card that says Welcome to the Hive (from PTI's Honey Bees Sentiments).  The card was made using Cricut cartridges Walk in My Garden and Create a Critter.  


 I hid the contours of the base cut, copied, flipped and welded to create the card base.  Then I cut the base cut again for the card front.  On the layer I used my Cricut markers for definition.


 For the bee I used white glitter CS for the wings and added yellow glitter to the antennae.  Plus wiggle eyes of course!


Ems said she thought it was childish and I suppose it is a bit cutesy for an adult male.  But I say it's the thought that counts!  We will put in a gift card as well.

Card base and stamp are from PTI.  Most other products are Stampin' Up!  Thanks for looking!

Thursday, November 15, 2012

In the Meadow We Can Build a Snowman...

Walking in a Winter Wonderland is one of my favorite holiday tunes--it's just so fun!  This cute snowman, who may or may not be a parson, is from A Quilted Christmas, cut at 4", without the "quilted" layer.  Paper is Snow Festival.  I used a Cuttlebug folder on the red layer.  


I just love snowmen!  And this one looks so happy, plus he won't turn to mush at the first sign of a warm spell.

Have a great day everyone!

Wednesday, November 14, 2012

Christmas Owl

Gasp!  Another owl card?!?!  Could it be I'm being seduced by the dark side of the OWL Force?  I have to admit, this particular owl is exceptionally cute!  But it turns out the Director of Disciple Development at our church likes owls!  So I can indulge my need to use all my cutesy Cricut stuff with her.  I plan to make her several owl cards over the next week or so.  


The image is from Create-a-Critter 2 and is cut at 4".  The bizarre owl paper is from SU's Snow Festival, in the Holiday Mini Catalog.  The ribbon and layer are Gumball Green.  Base is PTI, owl colors are Early Espresso, Soft Suede, and Crumb Cake.  Hat is embellished with Liquid Applique and Dazzling Diamonds glitter.

Thanks for taking a look--have a great day!

Tuesday, November 13, 2012

Get Well Beary Soon!

Good morning!  Another Teddy Bear Parade card to share with you.  I made this one before I received my Peachy Keen stamps in the mail, so this is how they look straight from the cartridge.  


Again, bear is cut at 4".  Card base is PTI white, layer is Green Galore (SU ret) and the DP and brads are also SU retired.  I used red stickles on the heart on the X-ray.  This cartridge is extremely easy to use and so cute!

That's it for today--thanks for stopping by!

Monday, November 12, 2012

Happy Bearthday

I got this cartridge, Teddy Bear Parade, a while back but haven't played with it too much.  But I saw a cute card HERE and decided to case it.  I used VERY old patterned paper by Junkitz and Peachy Keen stamps for the bear's eyes.  I put Crystal Effects on the balloon dog to make him look shiny, and used real pom poms for the buttons.  The inside is stamped Happy Bearthday, from SU's retired Build a Bear sentiments set.


Bear and layers are cut at 4".  I used a little piece from an old corner punch for his mouth.  Card base is PTI's Summer Sunrise, layer is retired SU Taken with Teal.

Hope you enjoyed this card--TFL!

Monday, November 5, 2012

Baby Room Decor

Wait...WHAT?!?  No, it's not for me!  These plaques are for the scholarship auction!


I used the Word Collage cartridge and my Gypsy to design these.  I bought wooden plaques at Mike's and painted them with Martha Stewart paint, color Summer Linen--love it!--three coats.  I measured the width of the plaques and sized the art at 5" wide, which makes it 10.5" high.  I cut each piece out of vinyl to create a stencil.  In hindsight, I probably could have used clear contact paper--cheaper.  I had to weed each little letter!  Took forever!  And the centers of the little A's (they were the worst) and some of the other letters had to be left behind...this project was seriously time consuming!  I used transfer tape to pick up my stencil and trimmed the edges very close to make it easier to line up.  I separated the flourishes from the main artwork so I could put them closer to the ends.  I also used the same flourishes on both pieces, even though they have different flourishes.


Then I used various gender non-specific colors of MS paint to stencil.   To finish I sprayed them with 2 coats of clear matte acrylic spray.


I'm including some Command strips to hang them with--this way I don't have to deal with hardware.  I hope someone likes these enough to bid on them.  The trouble with nursery stuff is people usually have a color scheme, and if something doesn't go with it, they won't buy it.  We shall see.

I really like the way these turned out, even though they were a pain!  Hope you like them too.  Thanks for stopping by today!

Sunday, November 4, 2012

Thanksgiving Decor

I made this plaque for a Thanksgiving/autumn basket for our scholarship auction.  I am also putting in a pumpkin spice jar candle (for which I may or may not make a label--haven't decided yet, probably will) and a box of pumpkin bread mix.


I was inspired by an item I saw in the Nov/Dec issue of PaperCrafts magazine, or possibly their holiday issue.  I am, after six years, letting my subscription lapse.  I think I can get more and better inspiration from the internet.  
I used a Basswood Round from Michael's.  I used the Thanksgiving seasonal cartridge and my Gypsy to cut the phrase out of dark brown vinyl.  I cut it at 8" wide, which works out to be 3.13" tall.  I hot-glued wired ribbon (LOVE that stuff!) and a fall floral pick from Mike's to finish it up.  I'm also including the easel.  I like how this turned out.  If no one else bids on it, I just might get it for myself LOL!

Thanks for dropping by today.  Have a creative day!

Saturday, November 3, 2012

Christmas Card 5

This card uses ODBD's set His Gift.  I stamped the poinsettia collage image in Cherry Cobbler on Primrose Petals and spritzed it with the shimmer paint mixture.  I matted it on CC.  GG layer is embossed with SU's square lattice folder.  


I just love collage images AND poinsettias, so this is a two-fer for me!  Hope you enjoyed it as well.  I hope this basket of cards gets lots of bids.

Friday, November 2, 2012

Christmas Card 4

For this card I used ODBD's set Sweet Christmas Wishes and matching window die.  I colored the image using blender pens and ink pads.  Ribbon is Gumball Green that I got FREE with some SU promotion.  


Again, fairly simple but pretty I think.  

Thanks for looking!

Thursday, November 1, 2012

Christmas Card 3

For this card I used the ODBD set Worship the Lord.  The mat was cut out using the Cricut cartridge Elegant Edges.  I stamped the image in Cherry cobbler, matted it with the SU Be of Good Cheer DP, and added a Prima Poinsettia and Holly Leaf.  I also spritzed the main panel with Champagne Shimmer Paint dissolved in alcohol, but I don't think you can see it in the picture.  


This looks kind of plain, but it's pretty IRL.  Thanks for dropping in!  Have a wonderful day!

Wednesday, October 31, 2012

Christmas Card 2

Here is the third card for my auction basket (see previous post for the first two).  I stamped ODBD's Christmas Tree Collage on Very Vanilla in Gumball Green, trimmed it and matted in on a Primrose Petal layer that I punched with an EK Success border punch that I got at Wal-mart.  


I embosed the frame from SU's Four Frames and the sentiment from Best Yet (retired) in gold, using my Stamp a ma jig to line everything up correctly.  I punched it out with an SU punch and layered it on PP.  I popped it up, atted gold brads to the green stamped panel, and adhered the whole thing to a Gina K Pure Luxury vanilla base.  I tried to use embellishments that would make these cards fairly flat and easy to mail.  

Thanks for looking!  More tomorrow!

Tuesday, October 30, 2012

Christmas Card

Hi, all!  This weekend is the United Methodist Women's big fundraiser for their scholarships.  We do a turkey dinner and a basket auction.  I am making a couple of small baskets of cards, one Christmas, one birthday.  In the past I have done "A Year of Cards" but I think this will be easier.  


On all of these I have used the same color scheme:  vanilla, Cherry Cobbler, Primrose Petals, and Gumball Green.  DP is Stampin' Up! Be of Good Cheer (current!  I know!)  I box pleated a strip of it and layered it onto a piece of GG.  I used a SU border die and embossing folder to create the stamped panel.  Set is PTI's Love Lives Here:  Holidays.  Ribbon is SU Cherry Cobbler Seam Binding.   I am very pleased with the way this turned out!  I plan another variation of this card soon.   I copied it from one that my awesome demo, Karen, showed us at stamp club.

Another card that's going in the basket may be seen HERE.  

More cards in the next few days...stay tuned!

Friday, October 12, 2012

Eat, Drink, and Be Scary

Another project for the Cricut contest.  I cut the potions base at 2.5" from some plastic packaging leftover from PTI stamps.  I edged them with a black sharpie.  I cut the layers from various colors of glitter paper and adhered them, and used colored rhinestones for the tops.  I cut the frame from the Elegant Edges cart at 4.25" from black glitter paper.  Card base is Cajun Craze, layer is Basic Black and DP is retired SU.   On the inside it says "eat drink and be scary".


Thanks for taking a look!


Thursday, October 11, 2012

Monster's Ball

Cricut is having another contest!  You are to make a project using either the cartridge "A Frightful Affair" or the Craft Room digital cart "Movable Monsters".  You all know how much I adore Halloween.  I think I have nearly every Halloween stamp set and Cricut cartridge ever made.  


For this project I chose to use MM because I thought it would be fun to have Frank dancing with his bride.  I created the files in Craft Room (which I find cumbersome) and downloaded them to my Gypsy (which I love!).  Then I resized everything.  Frank is cut at 4".  This makes him about 10" tall when assembled.  I think the 4" must refer to his torso.  So when I cut the bride at 4",  she came out HUGE!  Way taller than Frank.  Well, I am a traditionalist and couldn't have that!  I wound up cutting her at 2.5".  


I used Ruby Red Liquid Pearls on her lips and fingernails.  Her necklace is a brad.  I reworked her left sleeve to make it hang down.  In the original file both hands are on her hips so both sleeves hang straight down.  Since I wanted her holding hands with Frankie, I had to cut and paste her sleeve so it wouldn't be defying gravity.


I drew on Frank's scar and mouth and added googly eyes.  The cool thing about this cart is that you put the pieces together with brads so you can pose them.  

Much as I'd like to, I know I won't win this time.  Some of the entries are AMAZING!  So fun how inspiring Halloween is to crafters.  Thanks for dropping by--have a spooky day!

Thursday, September 20, 2012

Happy Owl-o-ween!

So, for those of you that know me, you'll remember that I am not an owl person.  I don't hate them, I just don't see why everyone else seems to go ga-ga for them.  But I do like them for Halloween.

I just received my Create-a-Critter 2 cartridge that I WON today.  The Gypsy is STILL not updated, so I had to (gasp!) make this card using only my Cricut.  It was pretty easy though.  I cut the owl at 4" and the branch at fit-to-length 3.5".  I added glitter to the leaves and embossed and sponged the owl's tummy.  Patterned paper is long-retired SU, CS is Old Olive, Perfect Plum, Basic Black, So Saffron, and Tangerine Tango.


Hope you enjoyed this card--thanks for dropping by!


Monday, September 17, 2012

First Christmas Card of the Year


I made this card as a submission for Papercrafts Magazine but didn't get it submitted in time!  Oh well.  I really like how this turned out.  All supplies are current SU except for the brads. 
This is my first blog post from my phone!  Cross your fingers that it works, and thanks for stopping by!

Published with Blogger-droid v2.0.8

Monday, September 10, 2012

Cricut Contest


Recently there was a contest on Cricut.com.  They made 5 images from their new cartridge, Create a Critter 2, available in Cricut Craft Room, which is kind of like an online design software.  I don't use it much because I have a Gypsy and because I have to haul my Cricut upstairs to hook it up to the computer to use it, but I couldn't resist entering the contest.  I wanted to use fabric to make a baby item with the lion image.  I used Heat & Bond Ultra to adhere the fabric.  You can see the result below.  The bib is from Hobby Lobby.


And guess what?  I was one of the winners!!!  Not the grand prize winner, but I did win this Hello Thursday's cartridges--CAC2 and Suburbia.   I am pretty stoked!  


This little ghost was another image--I decided to make a shaped card, but I couldn't get my images to weld.  I must be doing something wrong--need to practice more, but like I said, it's a pain bringing up the Cricut to the computer.  I wonder if you can use this app on an Ipad.  I don't have an Ipad but it would be a good excuse to get one don't you think?


So I just did the trick where you score the card back and use Sticky Strip to adhere the card front to it.  I used a retired SU set for the sentiment on the inside.  I put glitter on the little bag.  I think it's cute but there were LOTS of great entries using the little ghost.  CAC2 is a really cute cartridge and one I know I will use a lot.  So happy to win something for a change!  Thanks for stopping by.  I have been making lots of cards; just haven't gotten around to blogging them yet.  Have a great day!

Wednesday, August 15, 2012

Yummy Cupcake

Good morning!  I used the Stampin' Up! set Create a Cupcake and matching cupcake punch to create this card.  I used a crop-o-dile and my oval scallop punch to simulate the bite marks in the top of the cupcake.  Ink colors are Pretty in Pink and Regal Rose (sorry about that Chris lol!)  DP and ribbon are SU retired, card base is PTI white.  On the inside it says, it's not how many candles you blow out, it's how many cupcakes you get.  I am going to work on this idea some more and perhaps add to it.


Thanks for taking a look!

Tuesday, August 14, 2012

How could I forget your birthday?

Hi!  I did this card for a challenge over at Bitten By the Bug 2.  We were to make something with an elephant on it.  There are tons (no pun intended lol!) of cute elephant cuts on the various cartridges, but I wound up choosing this one from ZooBalloo, mostly because I like giraffes.  Go figure.


Most of the CS is retired SU except for Bashful Blue (sky) and Certainly Celery (grass).  The clouds are actually from the SU cupcake punch.  I had punched some out for another card, which I will show tomorrow, and so I used them for clouds.  I used my Cri-kit markers to outline the cuts before I cut them out.  Grass is a MS punch.  I can't decide if I want to make it a straight kids' birthday card or computer generate a cute saying like "How could I forget your birthday?" and make it a belated birthday card.  Since that is the kind I usually send.  

Thanks for stopping by today.  Have a great day!


Friday, August 10, 2012

Shaped Christmas Cards

Good morning!  I used my Gypsy and the Jolly Holiday cartridge to make these shaped cards.  The first one I used a different method than welding--I cut out two of the same shape, scored one, and adhered the other to it at the top.  


Side view.  All layers are popped up.


The second one is welded.  It's hard to tell, but that's supposed to be Santa's feet sticking out of the chimney.


All the "snow is made of white DCWV glitter paper.  I made the wreath on the door with a green fiber I had in my stash.  The bow is baker's twine, doorknob is a brad.


I used a sentiment from PTI's Love Lives Here Holidays for the inside--it says "Merry Christmas from our house to yours."  Thanks for stopping by today!


Thursday, August 9, 2012

Sweet Sixteen Shaped Card

Wow, no posts for months and now two in one day!  Emily is going to her friend Natalie's sister's (Alli) sweet sixteen party tomorrow night.  So I made a card.  Alli's colors are hot pink and silver, so I used my LAST sheet of PTI's Raspberry Fizz.  I wound up not using the big piece of RF I cut.  I used the numbers on the Sweet Treats cartridge, welded the shadows together to form a card base, then cut a welded shadow piece from SU brushed silver to cover it.  Next I cut the numbers from the RF polka dot and the flames from silver again.  I cut the letters from Type Candy, font Taffy Script.  Shadow is in silver, letters are in RF.  I popped everything up with foam tape and added rhinestones.  


I had fun making this card, and I hope Alli likes it.  I'll probably get her a gift card to the mall to put in it.


Thanks for stopping by again today.  Any and all comments are greatly appreciated!


I'm Still Alive!

So Sheila over at She's a Sassy Lady has a shape card challenge going on.  I decided to use this cute haunted house from Mini Monsters.  With my Gypsy I created the base layer at 5.5" and hid all the contour lines.  Then I copied it, flipped it vertically, and welded the two cuts at the roof line and cut it out of white heavy cardstock (PTI).  This creates the card base.  You will see when you cut it out there are 4 little triangles sticking out from the roof sides on the sides of your card.  I trimmed these off with scissors.  I then cut another base layer out of SU Lavender Lace (retired).  For the roof, I wanted the shingles to stand out, so I used my Cri-Kit black gel pen, then cut the layer out of Lovely Lilac (retired).  I cut the shutters and door out of Kiwi Kiss (ret.) and the windows from So Saffron.  I popped up all the layers and used a black brad for the doorknob.  I thought it still needed something so I cut the black cat from Happy Hauntings out at 0.5" and stuck her on the roof.  


Here is how it looks from the side.  I stamped "Goblin Greetings" on the inside (SU ret.)


I have been painting and re-doing my craft room in my spare time and it has taken most of the summer. I still have one more shelf to paint and then it will be a little better.  But I couldn't stand not crafting any more!  My mojo finally seems to have returned somewhat.  Thank goodness--I was beginning tho think it was gone for good!

Thanks for stopping by today.

Saturday, June 16, 2012

Simple Card

My son Matt went to Camp Orr in Arkansas for a week.  I sent him a couple of cards--this was one.  There's no stamping.  The DP is K & Company.  I sponged the edges, added some red hemp and eyelets, and wrote Matt a letter on the inside.  He did a trekking trip.  He backpacked 33 miles over 3 days and also did some canoeing.  When I asked him what his favorite thing was, he said "the canoeing, because I got to sit down!"  LOL!  He and his dad are going to Philmont in a couple of weeks.  He will be backpacking for 10 days, probably not as many miles per day, but he will be at altitude.  Thanks for dropping by!